Friday, October 8, 2010

A How To


Here's a pretty simple tutorial on how I make a knife/knives (I'm showing a couple just in case Mr Murphy decides to show up and have a little fun at my expense)


The particulars


Steel - 5/32 1095


Grind Type - Full Flat
Handle Materials - Not sure yet. Will wait until the Hamon develops and then decide


Step 1 - Rough out the profile


The knife profile is roughed out through the use of a Metal band saw, Belt Grinder and Files. I have also coated the blade area with layout fluid to act as a visual aid to help with determining grind heights.


Step 2 - Scribe the knife edge


The cutting edge of the knife is scribed for a couple of reasons. It acts as a visual aid to ensure that the cutting edge is symetrical (ie along the centerline) to the knife and it acts as a guide to make sure that there is enough material to prevent blade warping in heat treatment. The scribing is done by placing the knife on a flat surface and using the point of a drill bit to "scratch" the scribe line into the blade. The knifemaker's rule of thumb is "Thick as a nickle before heat treat and thin as a dime after" - with the caviat that this depends on the knifes intended use (A slicing knife will typically be thinner at the edge and a heavy camp/chopping knife may be thicker.


I tend to go a little thiner than that rule of thumb as I want to minimize the amount of removal after heat treat as you can ruin the heat treat by over heating the blade while grinding. As with most things in life there are trade offs. The trade off in this case is the thinner the blade edge at heat treatment the higher likelyhood of warpage or cracking.


3 - Set initial Bevel


The initial bevel is cut in from the edge of the knife to the scribed line on the edge. This provides the maker the benefits of:

1 - The point at where the initial bevel stops (plunge) acts as a "edge stop" for the grinder. As you grind and go across the knife you can feel the point and it acts as a stop (Fair warning - it is pretty easy to run the grinder over the plunge, especially if you try and take too much material off in one pass)


2 - After you cut in the initial bevel, you are able to to see (as you look down) the grind match the edge you initially set


Step 4 - Intermediate Grinding


You continue grinding, "walking" your grind height to the point that you wish to stop (In this case we are going to go full height. You can see the benefit of the layout fluid provides if to want to stop short of going full height to ensure that your grind heights are equal on both sides.


Step 5 - Full Height Grind


Another continuation of the initial grind taken to full height. At this stage all of the work has been done to 60 grit. At this stage your grind should be pretty well set. Once you've reached this point you need to refine the scratches. This is done by using successivly finer belts. I usually go to something around 240-320 grit before heat treatment. To refine the scratch pattern, the typical progression is to double the grit (Grits are finer as the number increases) as you go. For this sequence it would go 60-120-240-320. Lately I've been using 3M Gators (Trizact CF) Bets.


IMO they are an awesome belt for refining scratches and minimal material removal, which matches my grinding style. In my case my belt progression goes 60 - A300 (Gator) - A160-A100-A65. This progression yeilds a nice consistent 280grit finish.

Well thats as far as I got last week. I'll pick up the tutotial from here when I get back into the shop. We still need to clean up the plunge, drill holes for the handle hardware and heat treat the knives


October Update


Got a few things on the bench all in various states, now I need to start finishing. Some hunters, camp, wharncliff, EDC and chef knives. All carbon tool steel (1080, 1084, 1095)


Thursday, August 26, 2010

Missed One

Here's a recent one I missed from the previous post

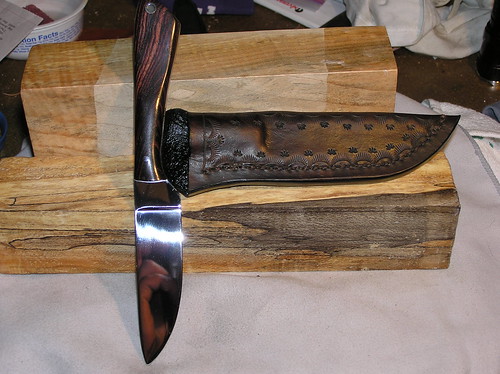
Cocobolo & 1084 w/hamon. This one has a high hollow grind and has a sculpted handle. The "Coke-Bottle" handle is very comfortable in the hand


1084 & Cocobolo Hollow ground


1084 & Cocobolo Hollow Ground

Wednesday, August 18, 2010

Examples of Past work

Hopefully there's been some improvement as the work has progressed

Sorry the photo's aren't the best but here we go:

Large Knife - ATS34 Whitetail Antler and Elk Antler spacer

Small Knife - ATS34 Whitetail Antler and Cocobolo spacer


IMG_0219


All 1095 - Handle Materials - Cocobolo - Black Ash - Cocobolo

Knives 4, 5 & 6

1095 - Handle Material Ziricote

Knife #3

1095 with Hamon - Bocote and Red Spacers

1095 and Bocote


1084 and Cocobolo

1084 & Cocobolo


1095 with Hamon and Bubinga

1095 & Bubinga


1084 Wharncliff with Hackberry scales

1084 & Spalted Hackberry


1095 Wharncliff with Hamon - Bocote scales

Bocote Wharny